Fan2Stage Equipment Test – OBS and Stream Deck

Fan2Stage Equipment Test – OBS and Stream Deck

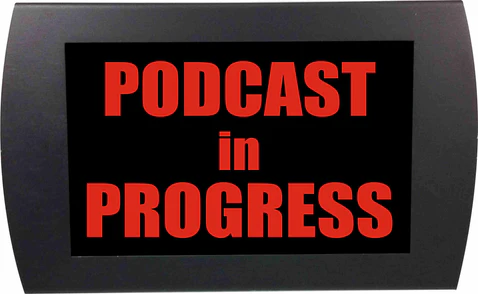
This test of OBS and Stream Deck is one of the series in which we test different live stream configurations. We test how well they work with Fan2Stage and the OnStage system for Live Streaming. If you want to start a live stream or live podcast check out all of our tests so you can decide which works for you. Most of our tests are done with YouTube Live Streaming at Ultra Low Latency unless otherwise noted in the show notes.

Test Rack – Macbook Air M1, 50″ HDTV screen, OBS, OBSbot Camera and Stream Deck with Thunderbolt Port Expander and external speakers.

Elgato Stream Deck

Limitations – The primary limitation is the ports. The MacBook Air only has two USB-C ports so you need to have a port expander. The OBSbot camera has a USB-A cord but didn’t like sharing the USB port with other devices. We had to dedicate one USB port for the camera.

The Stream deck, Keyboard, Mouse and 50″ screen were all plugged into a Thunderbolt Port Expander. The Stream Deck lets you quickly insert graphics, change cameras and do all kinds of quick tricks when you are running your own show. We all want a team but they get expensive quick. The stream deck from elgato makes it a lot easier.

The Benefits

One key to success with the Stream Deck is that you need some pre-show time to set up all of the buttons. I have tried just doing “scene 1”, “PIP 1” and then use a script to know when to press the buttons. It is much easier to label a button “skateboard” for the skateboard insert.

With OBS the media doesn’t always autosize the way you want it to. You may need to size all of your extra media in advance as well. For instance in the season finale for CoolToys® TV season 4, we had some 4K video from NAMM. We needed to scale it to 1080p to fit the window, otherwise we had some very odd close up’s.

The Bottom Line

Overall OBS and Stream Deck is a great starter set up on a budget. It won’t keep up with dedicated hardware integrated systems like Black Magic, but it is only one tenth the cost. OBS is essentially free and the Stream Deck is under $150 for the small one. Most live streamers will do fine with just the small OBS unit. Having the big screen to run OBS and the small screen on the Mac as the screen for the “OnStage” web application worked great. I think a second screen is almost required to make this work right.

By using the external speakers the crowd input from the Fan2Stage Virtual Audience System was loud enough to be picked up by our microphones so the fans can hear it. There isn’t a way to loop the audio directly back into OBS that we could find. It might be possible to create and audio capture out of the browser window, but you might end up with a double pickup. Also you would have no control over the volume. A second microphone and a mixer could be a cool addition but we haven’t tested that yet.

Getting Ready for NAMM

Getting Ready for NAMM

At the end of January one of the biggest shows for the business side of the business is happening. Just across the street from Disneyland at the Anaheim convention center will be the NAMM show. We will be there, will you?

Gear Matters

While we built Fan2Stage to work with just about any type of live streaming or podcasting setup, we’ve learned that some like Twitch have big delays that just don’t really work if you want a truly live response from your audience. We are going to NAMM to see if there is any new gear there and connect with the companies that make the gear we use in the Fan2Stage and CoolToys TV Studios.


While building the Fan2Stage system and the F2s.Live servers we want to be able to run the entire process on mobile devices, and the good news is you can. As with all things in the entertainment business there can also be a better way. Currently we use several systems in our studios because we are always testing. The minimum system for the OnStage performer we recommend is a good Android Tablet or iPad. From there, OBS, Black Magic, Roku, Stream Deck and Canon Cameras are all over our studios.

It’s about the Show

Everything we do at Fan2Stage is focused on making the show better. Just because fans have to stay home or you want to host a live show from the beach in Bali, it doesn’t mean you can’t connect. The whole idea of Fan2Stage is to keep the fans and performers connected. Without the human connection, what is the point. Aren’t you just talking to a camera? When the fans are more engaged you are more engaged.

Fan2Stage, a simple solution so that there is A Live Audience for Any Stage.

Fan2Stage 2.0a Screenshot

Fan2Stage helps start LSPANA

Fan2Stage is proud to be a founding sponsor and partner of LSPANA. Pronounced El-Spana, LSPANA was founded to create a common place for live streaming artists and vendors to share ideas and problems to move the live streaming world forward.

Live streaming exploded during the pandemic and has continued to grow at double digit rates. When we were approached with the idea of a specialized industry association focused only on Live Streaming, we knew that now was the right time. With LSPANA you will get coverage of the latest gear and techniques to make your live streaming events better than ever. With giant flat screen TV’s in almost every home, why make your fans sweat in traffic when they can join you live from anywhere?

Even if you have a small exclusive audience you can expand your shows reach by using Fan2Stage and other live stream technologies to create a super show. Live Stream and live shows, the best of both? If you live stream consider joining LSPANA today.

Support live music with the Live Fan App by Fan2Stage

Support Live Music – From Home?

Live Music is something that brings us all together.  After a visit to the Rock and Roll Hall of Fame in Cleveland Ohio, I realized how much of an impact live music has on our lives.  With the introduction of high speed internet and video live streaming, live music can happen anywhere any time.  The problem is that live-streaming a show, isn’t the same as a live show. Now you can be a part of the show and support live music even from home.

An artist or performer can use a meeting program and see a bunch of tiny faces on the screen and get distracted by the chat boxes, hand raising or funny emoji’s or you can get Fan2Stage. Fan2Stage supports live music because the performers hear real cheering from real fans without distracting little screens.  How does it work?  Simple.  After building a profile and posting a link to your show on your socials, your fans start the connection.  All you need is an android or apple mobile device with an audio out connector.  Basically a headphone jack or adapter.  

The headphone jack plugs into your soundboard, speakers or however you want to hear the fans and voila, you have a live audience in the room with you.  

How Do You Hear The Fans?

The fans at the other end watching your show on a smart TV, computer or even a tablet simply use the Fan2Stage® Live Fan® app to connect to the show.  With the app they have six reactions, clap, cheer, boo, whistle, aww and laugh.  As they press the buttons faster and harder your live audience sounds grow exactly the same way they would if the fans were in the room with you.  No tiny faces on the screens and no chat boxes to try and read that distract you from the show.  Just real fan feedback that you need to be your best.

If you live stream, don’t do it without Fan2Stage.  Sign up for free and make your show truly alive! If you are a fan and want to support live music, download the LiveFan App and let your favorite live-streaming performers know you want them to hear you cheer!

The right way to build a home studio - Foam Wedges

The Right Way To Build A Home Studio

Yes Virginia, there is a right way to build a home studio.

Before hosting CoolToys TV, I spent years studying to become one of the best home theater designers I could be. It turns out that recording studios follow the same rules. Home Studio design became a nice addition to my business. I was inspired to write this in a hotel room, two rooms away from the elevator. 6 AM the elevator started going non-stop and I can hear it clearly.

Basically there are three things to worry about when designing and building a room. Room Noise, Echo and outside noise. I’ll tackle them one at a time in the order that you are likely to build the room in. And I’ll use terms that will make you sound like a pro when you order materials or call a guy like I used to be. I don’t build home theaters or studios any more. Occasionally I get called in to listen to a room and figure out the problem, but I am expensive so that is only once or twice a year.

Isolation

Isolation is what the hotel I am staying at needs right now. If they had properly isolated the elevator I wouldn’t hear the whir of the motor as it goes up and down every 1 to 3 minutes. My home studio needed isolation for my wife to voice audio books because we live near an airport and the jets flying over were messing up her work.

Isolation is the toughest problem of any room located near anything that generates noise. One flaw in my studio is the garage door opener. It is bolted right to the frame member that runs into the studio. Even a pro can miss something.

There are companies like Acoustiblok that specialize in acoustic isolation. Basically you are trying to limit the physical connection between you and the noise source. When the sound of the jets hits a single pane window, the window vibrates and acts like a speaker. A double pane window is better because the sound is changing mediums twice. It hits glass, then air, then glass again. Even so sound gets through.

Sound Sneaks In

My home studio is “double walled”. Some builders call this an apartment wall. Basically you build a wall in each room with 1 or 2 inches between them. Because there is a shower and a water line in the wall next to the recording studio, a double wall was required so I could use the shower while she worked. This is the most basic form of isolation.

Both walls are also insulated with a mineral wool insulation. This is the trick of very high end builders. They fill the interior walls of the house with insulation. It makes the house quieter. Most people will describe the house as “higher quality” and “warmer” when this is done. The best will even use different thicknesses of wall board on each side of the wall. The different thicknesses each transmit sound differently, adding to the acoustic dampening of the house.

The next method to consider if your sheetrock is not up is isolation tracks. These come in all forms. The term the pro’s will use is “decoupling”. By using an isolation track, your sheetrock has less direct contact with a solid surface like the wood stud. Basically rubber blocks or metal tracks with rubber blocks are attached to the wood studs (avoid metal, it rings). The sheetrock is then screwed onto the tracks or blocks. This method takes a lot more skill, and isn’t always affordable or even necessary.

Weight Matters

The weight or “total mass” of a wall is a big factor in how much noise gets in. Loaded vinyl barrier is one way to increase the mass of your walls. This stuff weighs about one pound per square foot and is quite difficult to install without tearing it due to the weight. We put in in the ceiling of the garage below the recording studio and under the floor in the studio.

Weight can be added in other ways as well. 2×6 walls have more weight than a 2×4 wall, and a 2×6 staggered stud wall adds weight and increases isolation. There is wall board material that has extra weight added that is just for sound isolation. It is off course heavy and very expensive. I have seen some people simply add a layer of this to the walls without doors in a bedroom and the difference is noticeable.

Sound is Like a Mouse.

Even with all of the great insulation, sound can still leak into a room. Like a mouse it can squeeze into the tiniest gap and make it to the next room. One simple rule is to never have electrical outlets on both sides of a wall in the same stud bay. I also silicone fill or foam fill every wire hole in the bay that has an outlet on the studio side. The final step is to use a heavy clay and seal the back side of the electrical outlet and the front side after the sheetrock is up.

Every seam needs to be sealed as well. With the loaded vinyl barrier, this can be a challenge because lining it up during installation is difficult. You should install it loosely so it has a little “dip” in each stud bay. Then you need to tape the gap between layers.

Once the sheetrock or wall board is up all of the edges need to be sealed there too. You will be amazed at all the little gaps. Especially around the bottom where the baseboard will hide them. Trust me when I say it isn’t easy, but get it right and the room will “feel” much better.

Doors and Windows

All of the detectable sound in our home studio comes from three places. The door to the hall, the French doors to the balcony and the window. Each of them is treated slightly differently. The studio door could have been a sealed double door. Instead we made a short hallway with thick carpet and insulated the adjacent area. The window has a plug in it that you can see in many of the newer CoolToys® TV episodes.

Exterior doors are always a challenge, French doors are the worst. With most doors the easy solution is to double them up with exterior sealing doors. Late Night Union Singer Christian Erik did this for his home studio and editing room. Each has double sliding doors. Turn off the microphone and you can barely hear the drummer destroying the drums.

We handled the French doors with a couple of curtains. One is a simple photographers muslin. We use that mostly to create a “key light” when I video record in the room. Since it wasn’t intended as a video recording room, there is also a very heavy blackout curtain. This is made from an acoustic blanket covered in black fabric. It acts as a “negative” so the room isn’t too bright for audio recording.

Room Noise

It all starts with the room. Every room has natural noise. There are a lot of causes and your breathing is one of them. Sound is very predictable. A 60hz bass note is about three feet long. While studying to become a THX certified home theater designer, the instructor set up a great demo. He put a speaker three feet from the wall, and aimed it at a wall 18 feet away. The class room was 21 feet across.

He then had X’s on the floor and had everyone stand on an X. Then he turned on the speaker and played the 60hz note. Only a few of us could hear anything. We were standing in the “lull”. This is the place where the wave bounces off the wall and cancels itself out. Very much like backwash at the beach at high tide. The sound is crashing into itself at opposite sides of the wave so there isn’t anything to hear but the crash.

Next we would walk very slowly to the X in front of us. As we did that we hit a point called the “peak”. This is where the two waves lined up and effectively doubled the perceived energy. Basically the 60hz note was near deafening. He then turned off the sound and said “Design a room wrong, and half of the seats get no bass. Worse yet, the other half get too much, and that is why you are here”

Standing Waves

The biggest enemy of a designer is the “standing wave”. This is where the audio has a specific peak and lull Room noise is solved with two things. Shape and absorption. This class I was taking that day was called “Room Shape and Modes”. Modes are the cause of a standing wave or the result. It is a Chicken and egg question that really doesn’t matter. If you have room modes, you have standing waves.

Most great theaters have a semi domed back wall and are wider at the back. Sort of an odd trapezoid shape. This prevents those “standing wave” from having anyplace to build itself. This isn’t always possible at home, so a man named Bolt created the Bolt Ameoba. Essentially a simple formula to limit room modes. The formula is simple, 16x9x21 is the ideal room and as you tweak those dimensions the line creating the perfect room looks like an Ameoba.

As we got smarter about this another man, Bonello created a “window” calculator that allows you to figure this all out even more accurately. With home studios, the room dimensions are usually pretty set before you build so both of these tools aren’t of much help. The basic rule is don’t use a square room. 12x12x8 is about as bad as it gets. If that is your room, add a false wall somewhere to change the acoustic shape. Even some old cubicle panels from an office supply store can help.

Echo

The real problem with square or rectangle rooms is echo. Room modes are in fact nothing more than echo. The problem is that if you eliminate all echo, you get a “dead” room. People who aren’t trained tend to get disoriented and nauseous in rooms like this. When the door closes and they hear their heartbeat it makes them nervous. When you build a home studio the right way, it should be warm and comfortable. It shouldn’t feel like a tomb.

A room with no echo is an anechoic chamber. They are great for testing microphones, speakers and hearing. If you have every had a hearing test in a booth, that booth is an anechoic chamber.

The trick to dealing with echo is finding the right balance. Fortunately this can be done after the room is built. More importantly it can be changed depending on what you are doing.

Striking a Balance.

When a room is finished the truly hard part begins. If you did it right, you kept the sound out and prevented most of the problems the room itself can create. You can never solve for all of them so the fine tuning begins.

Foam, fiberglass and carpets are all great ways to tone down the echo in a room. In my studio there are two 2’x4′ foam panels on the front wall. There is also a 50″ studio monitor in there on a tilting mount. It has to be adjusted based on the height of the person using the room and the microphone placement. You can hear the echo of the flat screen with a little practice.

I mounted the acoustic foam panels to 2’x4′ foam board and used OnCommand® velcro hangers so I could move them if they didn’t work out.

The wall behind me also has a heavy grey background cloth that dampens voice very well along with two more of the foam wedge panels. The side walls have 2’x4′ photos that are wrapped over Acoustic Fiberglass panels. I didn’t want to just have foam wedges around the room. My wife is also a photographer, and she sells the acoustic panels with photos in 1″ and 2″ thicknesses.

Try and Try Again

The floor is reclaimed wood with two oriental rugs covering the middle of the room. The final echo to deal with is the ceiling. Up there I uses carpet tiles in a pattern with a solid area directly above the two microphone spots, and then opening more space as you go to the front. I glued them to the ceiling with 3M panel spray.

Getting the ceiling right was the hardest. I started with a 50% pattern like a checker board and ended up taking some down over the cameras and adding more over the microphones. I used 3M double sided tape until I knew where I wanted the panels for sure. The take won’t leave a mark if you take it down in less than a week. The spray is gonna stay.

Now that you have your home studio built, get a small computer in there and start hosting live shows with Fan2Stage!

Virtual audience for any studio

The Virtual Audience For Any Studio

In Todays World a Virtual Audience might be the best you can get. Now we have one for any studio.

Building a system for a Virtual Audience for any studio isn’t an easy task. For home users that don’t have the money or the technology, you need a simple system that just works and doesn’t interrupt the show.

Pandemic world or not, lets face it, more fans are better. Being able to reach out across the country or around the globe is the best way to do it. You can host an event or a “meeting” and look ad a couple dozen little faces or you can get a virtual audience. All those little faces are really a distraction for many live shows. A few can be great as focal points. That is why Fan2Stage was built to work with just about any platform.

Now we have versions that are compatible with Home Studio events, Pro Studio events with streaming channels and even Broadcast TV studios. Yes we now make a virtual audience server that will work with any studio.

All of the new plans go into effect on February 1st, 2021 and with that comes a new pricing structure. Recognizing that Broadcast TV isn’t always on 52 weeks a year, we now offer a quarterly plan for them. Our broadcast plans include streaming as well. One show, multiple threads.

As we announced earlier with the upcoming release of version 2.0 we will add the ability to collect tips or donations. Every account gets at least 70% of the money collected. You put on the show, we’ll send you the money you earn!

Fans Will Be Back With F2S

A Real Audience In Your Home Studio

Yes it is possible to have a real audience in you home studio.

What is a real audience anyway? Is it the guy in the booth at the football game hitting the “applause” button? Is it the guy in the booth at the talk show hitting the “laugh” button? No. It is real people with real responses to a live show.

A virtual audience server is the only way to do that, and Fan2Stage is the only real virtual audience server. The way we see it, all live shows need audience feedback. Sure you can make videos for YouTube and Vimeo or even TikTok and hope you get a thousand views but what does that really mean?

Fan2Stage

The only thing that matters is what fans really think of the show. More importantly what they think at the time of the show. If you have a home studio and can live stream, why not have a real response from a virtual audience? Yes you can have a two way video stream and try and figure out what 50 little windows are doing. The reality is that it becomes a distraction, not an enhancement to the show.

Only with a virtual audience server can your fans be heard my you and other fans. Imagine hearing the laughter and the applause live and in real time. It can happen with Fan2Stage. You can have a live audience in your home studio. If your fans download the Fan2Stage app, you can host a live show and get real time feedback from a real audience! Why not sign up today?